While developing with KendoUI we have found kendo.ui.progress(container,
toggle) function to be
very useful. It's used to show or hide a progress indicator
in the container element.
At the same time we have found that we usually used it in a context of async
operation. This way, we want to show progress, perform some asynchronous
operations, hide progress. So, we clearly want to benifit from
RAII pattern: we would like to open a progress scope, and to perform some
activity withing this scope.
Arguing like this, we have defined a utility function, which is the fusion of
kendo.ui.progress() and $.when(). Its signature is
like this:
nesterovskyBros.progress = function(instance /*, task ... */)
where instance is either Model, Widget, JQuery or DOM Element,
and task is one or more deferred objects. This function shows a progress
and returns a
Promise that will hide a progress when all tasks will be complete.
Implementation is trivial, so we quote it here:
// Fusion of kendo.ui.progress() and $.when().

scope.progress = function(instance /*, task ... */)

{


  if (instance instanceof Model)


  {


    instance = instance.owner && instance.owner();


  }


  if (instance instanceof Widget)


  {


    instance = instance.element;


  }


  if (instance && instance.nodeType)


  {


    instance = $(instance);


  }


  var id = ns + "-progress"; // "nesterovskyBros-progress";


  var progress = (instance && instance.data(id)) || 0;


  if (arguments.length < 2)


  {


    return progress;


  }


  var result = $.when.apply(null, [].slice.call(arguments, 1));


  if (instance)


  {


    instance.data(id, ++progress);


    kendo.ui.progress(instance, progress > 0);


    result.always(


      function()


      {


        progress = instance.data(id) || 0;


        instance.data(id, --progress);


        kendo.ui.progress(instance, progress > 0);


      });


  }


  return result;

};
The use is like this:
nesterovskyBros.progress(element, $.ajax("/service1"), $.ajax("/service2")).then(myFunc);
The code can be found at
controls.js.
While trying to generalize our practices from KendoUI related projects we've
participated so far, we updated
control.js - a small javascript additions to KendoUI.
At present we have defined:
1.
An extended model. See KendoUI extended
model.
2.
A lightweight user control - a widget to bind a template and a model, and to
facilitate declarative instantiation. See KendoUI User control.
3.
A reworked version of nesterovskyBros.defineControl() function.
var widgetType = scope.defineControl(

  {

   name:
  widget-name-string,

   model: widget-model-type,

   template: optional-content-template,

   windowOptions: optional-window-options

  },

  base);
When optional-content-template is not specified then template is
calculated as following:
  var template = options.temlate || proto.template || model.temlate;


  if (template === undefined)


    {


    template = scope.template(options.name.toLowerCase() + "-template");


    }
When windowOptions is specified then
widgetType.dialog(options) function is defined. It's used to open dialog based on
the specified user control. windowOptions is passed to kendo.ui.Window
constructor. windowOptions.closeOnEscape indicates whether to close opened dialog on escape.
widgetType.dialog() returns a kendo.ui.Window instance with content based on the
user control. Window instance contains functions:
result() - a $.Deffered for
the dialog result, and model() - referring to the user control model.
The model
instance has functions:
-
dialog() referring to the dialog, and
result() referring
to the dialog result.
widget.dialog() allows all css units in windowOptions.width and windowOptions.height
parameters.
base - is optional user control base. It defaults to nesterovskyBros.ui.UserControl.
4. Adjusted splitter. See Adjust KendoUI
Splitter.
5. Auto resize support.
Layout is often depends on available area. One example is Splitter widget that
recalculates its panes when window or container Splitter is resized.
There are other cases when you would like to adjust layout when a container's
area is changed like: adjust grid, tab, editor or user's control contents.
KendoUI does not provide a solution for this problem, so we have defined our
own.
- A widget can be marked with
class="auto-resize" marker;
- A widget may define a
widgetType.autoResize(element) function that adapts widget to a new size.
- A code can call
nesterovskyBros.resize(element) function at trigger resizing of the subtree.
To support existing controls we have defined autoResize() function for Grid,
Splitter, TabStrip, and Editor widgets.
To see how auto resizing works, it's best to look into
index.html,
products.tmpl.html, and into the implementation
controls.js.
Please note that we consider
controls.js as an addition to KendoUI library. If in the future the library
will integrate or implement similar features we will be happy to start using
their API.
See also: Compile KendoUI templates.
We heavily use kendo.ui.Splitter widget. Unfortunately it has several drawbacks:
- you cannot easily configure panes declaratively;
- you cannot define a pane that takes space according to its content.
Although we don't like to patch widgets, in this case we found no better
way but to patch two functions: kendo.ui.Splitter.fn._initPanes,
and kendo.ui.Splitter.fn._resize.
After the fix, splitter markup may look like the following:
    <div style="height: 100%"
    data-role="splitter"
    data-orientation="vertical">


    <div data-pane='{ size: "auto", resizable: false, scrollable: false }'>

    Header with size depending on content.


    </div>


    <div data-pane='{ resizable: false, scrollable: true }'>

          Body with size equal to a remaining area.


    </div>


    <div data-pane='{ size: "auto", resizable: false, scrollable: false }'>

        Footer  with size depending on content.


    </div>

  </div>
Each pane may define a data-pane attribute with pane parameters. A pane may
specify size = "auto" to take space according to its content.
The code can be found at
splitter.js A test can be seen at
splitter.html.
Although WCF REST service + JSON is outdated comparing to Web API, there are yet a lot of such solutions (and probably will appear new ones) that use such "old" technology.
One of the crucial points of any web application is an error handler that allows gracefully resolve server-side exceptions and routes them as JSON objects to the client for further processing. There are dozen approachesin Internet that solve this issue (e.g. http://blog.manglar.com/how-to-provide-custom-json-exceptions-from-as-wcf-service/), but there is no one that demonstrates error handling ot the client-side. We realize that it's impossible to write something general that suits for every web application, but we'd like to show a client-side error handler that utilizes JSON and KendoUI.
On our opinion, the successfull error handler must display an understandable error message on one hand, and on the other hand it has to provide technical info for developers in order to investigate the exception reason (and to fix it, if need):
You may download demo project here. It contains three crucial parts:
- A server-side error handler that catches all exceptions and serializes them as JSON objects (see /Code/JsonErrorHandler.cs and /Code/JsonWebHttpBehaviour.cs).
- An error dialog that's based on user-control defined in previous articles (see /scripts/controls/error.js, /scripts/controls/error.resources.js and /scripts/templates/error.tmpl.html).
- A client-side error handler that displays errors in user-friendly's manner (see /scripts/api/api.js, method defaultErrorHandler()).
Of course this is only a draft solution, but it defines a direction for further customizations in your web applications.
Useful links to those who are still dealing with Cool:GEN.
The site is not cool by itself, but the value is in the tools that authors provide to simplify Cool:GEN development. Especially we would like to mention:
- GuardIEn - Version control, change and model management and automated builds for CA Gen, and
- VerifIEr - Automated code checking and standards verification.
These tools help to manage clean and error free models, which simplifies next migration to Java and C# that we perform.
We have upgraded KendoUI and have found that kendo window has stopped to size properly.
In the old implementation window set dimensions like this:
    _dimensions: function()
    {


    ...


    if (options.width) {


    wrapper.width(options.width);


    }


    if (options.height) {


    wrapper.height(options.height);


    }


    ...


    }
And here is a new implementation:
        _dimensions: function() {

  ...


            if (options.width) {


                wrapper.width(constrain(parseInt(options.width, 10), options.minWidth, options.maxWidth));


            }


            if (options.height) {


                wrapper.height(constrain(parseInt(options.height, 10), options.minHeight, options.maxHeight));


            }


      ...

        }
Thus nothing but pixels are supported. Earlier we often used 'em' units to define dialog sizes. There was no reason to restrict it like this. That's very unfortunate.
To simplify KendoUI development we have defined nesterovskyBros.data.Model, which extends kend.data.Model class.
Extensions in nesterovskyBros.data.Model
- As with
kendo.data.Model there is fields Object - a set of key/value pairs to configure the model fields, but fields have some more options:
fields.fieldName.serializable Boolean - indicates whether the field appears in an object returned in model.toJSON(). Default is true.fields.fieldName.updateDirty Boolean - indicates whether the change of the property should trigger dirty field change. Default is true.
- When model defines a field and there is a prototype function with the same name then this function is used to get and set a field value.
- When property is changed through the
model.set() method then dirty change event is triggered (provided that fields.fieldName.updateDirty !== false). This helps to build a dependcy graph on that property.
- When model instance is consturcted, the data passed in are validated, nullable and default values are set.
Model example
Here is an example of a model:
nesterovskyBros.data.ProductModel = nesterovskyBros.data.Model.define(

{


fields:

{


  name: { type: "string", defaultValue: "Product Name" },


  price: { type: "number", defaultValue: 10 },


  unitsInStockValue: { type: "number", defaultValue: 10, serializable: false },


  unitsInStock: { type: "string" }

},


unitsInStock: function(value)

{


  if (value === undefined)


  {


    var count = this.get("unitsInStockValue");


    return ["one", "two", "three", "four"][count] || (count + "");


  }


  else


  {


    this.set("unitsInStockValue", ({one: 1, two: 2, three: 3, four: 4 })[value] || value);


  }

}


});
Notice that:
unitsInStock property is implemented as a function - this helps to map model values to presentation values. - when you call
model.toJSON(), or JSON.stringify() you will see in result name, price, unitsInStock values only - this helps to get model's state and to store it somewhere (e.g. in sessionStorage).
- in a code:
var model = new nesterovskyBros.data.ProductModel({ price: "7", unitsInStock: "one" });
the following is true:
(typeof(model.price) == "number") && (mode.price == 7) && (model.name == "Product Name") && (model.unitsInStockValue == 1)
As with UserControl the implemntation is defined in the controls.js. The sample page is the same index.html
Two weeks ago we've gotten new Lenovo 13" laptops (Yoga-13 with touch screens and Windows 8 Pro on board).
The first expression was WOW! Touch screens! Windows 8! Now we'll try our hand on that new (for us) API. So new, so cool...
A day later. What a shit this new UI. Where are my desktop, "Start" button, all the programs... After googling we've understood - we're not alone.
Few more days later. We've recognized that our SSD hard disk won't live long life with our projects. We generates output several GB a day. Thus we've decided to buy external SD cards - additional 64Gb, class 10. That's enough for us. No sooner said than done. After several attempts to copy our projects from hard drive to SD card (~9Gb of sources) we strongly believe that such a vigorous mix (Lenovo + Win 8 + external SD card) won't survive. Windows 8 hangs up when display off (in middle of data copy, after an hour of work). What a .... of .... this Windows 8, Lenovo and SD cards all together.
Developing with KendoUI we try to formalize tasks. With this in mind we would like to have user controls.
We define user control as following:
It is a javascript class that extends Widget.
It offers a way to reuse UI.
It allows to define a model and a template with UI and data binding.
Unfortunately, KendoUI does not have such API, though one can easily define it; so we have defined our version.
Here we review our solution. We have taken a grid KendoUI example and converted it into a user control.
User control on the page
See index.html
<!DOCTYPE html>

<html>

<head>


  <title>Test</title>


  <!-- (1) Include templates for controls. -->

    <script src="scripts/templates.js"></script>


  <script src="scripts/jquery/jquery.js"></script>


  <script src="scripts/kendo/kendo.web.min.js"></script>


  <!-- (2) UserControl definition. -->

    <script src="scripts/controls.js"></script>


  <!-- (3) Confirm dialog user control. -->

    <script src="scripts/controls/confirm.js"></script>


  <!-- (4) Products user control. -->

    <script src="scripts/controls/products.js"></script>


  <link href="styles/kendo.common.min.css" rel="stylesheet" />


  <link href="styles/kendo.default.min.css" rel="stylesheet" />


  <script>

$(function ()

{

  // (5) Bind the page.


  kendo.bind(


    document.body,

    // (6) Model as a datasource.


    { source: [new nesterovskyBros.data.ProductsModel] });

});


  </script>

</head>

<body>

  <!-- (7) User control and its binding. -->


  <div data-role="products" data-bind="source: source"></div>

</body>

</html>
That's what
we see here:
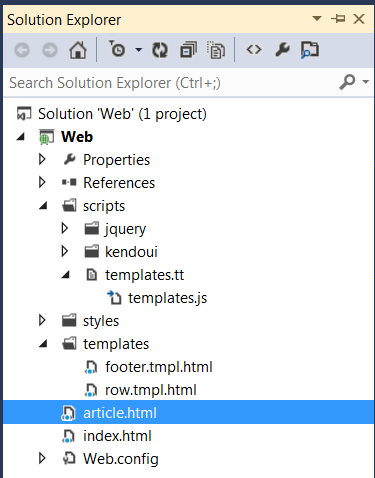
- Templates that define layouts. See "How To: Load KendoUI Templates from External Files", and templates.tt.
- Definition of the UserControl widget.
- Confirm dialog user control (we shall mention it later).
- Products user control.
- Data binding that instantiates page controls.
- Model is passed to a user control through the dataSource.
- Use of Products user control. Notice that "data-role" defines control type, "source" refers to the model.
User Control declaration
Declaration consists of a view and a model.
View is html with data binding. See products.tmpl.html
We build our project using Visual Studio, so templates packaging is done with templates.tt. This transformation converts products template into a tag:
<script id="products-template" type="text/x-kendo-template">
thus template can be referred by a utility function: nesterovskyBros.template("products-template").
Model inherits kedo.data.Model. Here how it looks:
// (1) Define a ProducsModel class.

    nesterovskyBros.data.ProductsModel = kendo.data.Model.define(

{


    // (2) Model properties.

fields:

{


  productName: { type: "string", defaultValue: "Product Name" },


  productPrice: { type: "number", defaultValue: 10 },


  productUnitsInStock: { type: "number", defaultValue: 10 },


  products: { type: "default", defaultValue: [] }

},


    // (3) Model methods.

addProduct: function ()
{
...
},

deleteProduct: function (e)
{
...
    },

    ...


});


    // (4) Register user control.

nesterovskyBros.ui.Products = nesterovskyBros.defineControl(

{


  name: "Products",


  model: nesterovskyBros.data.ProductsModel

});
That's what we have here:
- We define a model that inherits KendoUI Model.
- We define model fields.
- We define model methods.
- Register user control with
nesterovskyBros.defineControl(proto) call, where:
proto.name - defines user control name;proto.model - defines model type;proto.template - defines optional template. If not specified, a template is retrieved from $("#" + proto.name.toLowerCase() + "-template").html().
UserControl API
Now, what's remained is API for the UserControl. See controls.js.
- UserControl defines following events:
change - triggered when data source is changed;dataBound - triggered when widget is data bound;dataBinding - triggered befor widget data binding;save - used to notify user to save model state.
- UserControl defines following options:
autoBind (default false) - autoBind data source;template (default $.noop) - user control template.
- UserControl defines
dataSource field and setDataSource() method.
- UserControl defines
rebind() method to manually rebuild widget's view from the template and model.
- UserControl sets/deletes model.owner, which is a function returning a user control widget when model is bound/unbound to the widget.
- When UserControl binds/unbinds model a
model.refresh method is called, if any.
- You usually define you control with a call
nesterovskyBros.defineControl(proto). See above.
- There is also a convenience method to build a dialog based on a user control: nesterovskyBros.defineDialog(options), where
options.name - a user control name (used in the data-role);options.model - a model type;options.windowOptions - a window options.
This method returns a function that recieves a user control model, and returns a dialog (kendo.ui.Window) based on the user control.
Dialog has model() function that returns an instance of model.
Model has dialog() function that returns an instance of the dialog.
Dialog and model have result() function that returns an instance of deferred object used to track dialog completion.
The example of user control dialog is confirm.js and confirm.tmpl.html.
The use is in the products.js deleteProduct():
deleteProduct: function(e)

{


  var that = this;


  return nesterovskyBros.dialog.confirm(


  {


    title: "Please confirm",


    message: "Do you want to delete the record?",


    confirm: "Yes",


    cancel: "No"


  }).


    open().


    center().


    result().


    then(


      function(confirmed)


      {


        if (!confirmed)


        {


          return;


        }


...


      });

}
Last
User controls along with technique to manage and cache templates allow us to build robust web applications. As the added value it's became a trivial task to build SPA.
See also: Compile KendoUI templates.
At present we inhabit in jquery and kendoui world.
There you deal with MVVM design pattern and build you page from blocks.
To avoid conflicts you usually restrict yourself from assigning ids
to elements, as they make code reuse somewhat problematic.
But what if you have a label that you would like to associate with an input. In
plain html you would write:
<label for="my-input">My label:</label> <input
    id="my-input" type="text">
Html spec suggests to use element id to build such an association.
So, how to avoid introduction of id, and to allow to select input while
clicking on the label?
In our projects we use a little utility function that solves exactly this task.
It's easier to quote an example than to describe implementation:
<!DOCTYPE html>

<html>

<head>


  <title>Label</title>


  <script src="scripts/jquery.js"></script>

</head>

<body>

  <div class="view">


    <div>A template:</div>


    <table>


      <tr>


        <td><label data-for="[name=field1]">Name1:</label></td>


        <td><input name="field1" type="text" /></td>


      </tr>


      <tr>


        <td><label data-for="[name=field2]">Name2:</label></td>


        <td><input name="field2" type="text" /></td>


      </tr>


      <tr>


        <td><label data-for="[name=field3]">Name3:</label></td>


        <td><input name="field3" type="text" /></td>


      </tr>


      <tr>


        <td><label data-for="[name=field4]">Name4:</label></td>


        <td><input name="field4" type="checkbox" /></td>


      </tr>


      <tr>


        <td><label data-for="[name=field5][value=0]">Name5:</label></td>


        <td><input name="field5" value="0" type="radio" /></td>


      </tr>


      <tr>


        <td><label data-for="[name=field5][value=1]">Name6:</label></td>


        <td><input name="field5" value="1" type="radio" /></td>


      </tr>


    </table>

  </div>

  <script>

    $(document).on(


      "click",


      "label[data-for]",


      function(e)


      {


        var target = $(e.target);


        target.closest(target.attr("data-view") || ".view").


          find(target.attr("data-for")).


          filter(":visible:enabled").first().click().focus().


          filter("input[type=checkbox],input[type=radio]").change();


      });

  </script>

</body>

</html>
In our applications we must support IE 8, and unfortunately we hit some leak, which is registered as
Ticket #7054(closed bug: fixed).
While bug declared closed as fixed we can see that memory leak in IE8 like a mad.
Not sure if something can be done about it.
The test case is:
<!DOCTYPE html>

<html>

<head>


  <title>Test</title>


  <script src="scripts/jquery/jquery-1.9.0.js"></script>

</head>

<body>

  <script>

  function testLeak()

  {


    var handler = function () { };


    $('<div></div>').html(new Array(1000).join(new Array(1000).join('x'))).bind('abc', handler).appendTo('#test').remove();

  }


  $(function() { setInterval(testLeak, 1000); });

  </script>

<div id="test"></div>

</body>

</html>
Update: jaubourg has pointed that we have missed to define element with id="test". With this element leak stops.
Kendo UI Docs contains an article "How To:
Load Templates from External Files", where authors review two way of dealing
with Kendo UI templates.
While using Kendo UI we have found our own answer to: where will the Kendo
UI templates be defined and maintained?
In our .NET project we have decided to keep templates separately, and to store
them under the "templates" folder. Those templates are in fact include html,
head, and stylesheet links. This is to help us to present those tempates in the
design view.
In our scripts folder, we have defined a small text transformation template:
"templates.tt", which produces "templates.js" file. This template takes body
contents of each "*.tmpl.html" file from "templates" folder and builds string of
the form:
document.write('<script id="footer-template" type="text/x-kendo-template">...</script><script id="row-template" type="text/x-kendo-template">...</script>');
In our page that uses templates, we include "templates.js":
    <!DOCTYPE html>

    <html>

  <head>

    <script
    src="scripts/templates.js"></script>


    ...
Thus, we have:
- clean separation of templates and page content;
- automatically generated templates include file.
WebTemplates.zip contains a web project demonstrating our technique. "templates.tt" is
text template transformation used in the project.
See also: Compile KendoUI templates.
Our goal is to generate reports in streaming mode.
At some point we need to deal with data streams (e.g. xml streams for xslt
transformations). Often a nature of report demands several passes through the data.
To increase performance we have defined a class named StreamResource.
This class encapsulates input data, reads it once and caches it into a temp
file; thus data can be traversed many times. StreamResource can
read data lazily or in a eager way thus releasing resources early.
This class can be used as a variation of PipeStream, which never blocks, as if
a size of a buffer is not limited, and which can be read many times.
The API
looks like this:
  public class StreamResource: IDisposable

  {


    /// <summary>


    /// Creates a StreamSource instance.


    /// </summary>


    /// <param name="source">


    /// A function that returns source as an input stream.


    /// </param>


    /// <param name="settings">Optional settings.</param>


    public StreamResource(Func<Stream> source, Settings settings = null);


    /// <summary>


    /// Creates a StreamSource instance.


    /// </summary>


    /// <param name="source">


    /// A function that writes source data into an output stream.


    /// </param>


    /// <param name="settings">Optional settings.</param>


    public StreamResource(Action<Stream> source,  Settings settings = null);


    /// <summary>


    /// Gets an input stream.


    /// </summary>


    /// <param name="shared">


    /// Indicates that this StreamResouce should be disposed when returned


    /// stream is closed and there are no more currently opened cache streams.


    /// </param>


    /// <returns>A input stream.</returns>


    public Stream GetStream(bool shared = false);

  }
The use pattern is following:
// Acquire resource.

        using(var resource = new StreamResource(() =>
        CallService(params...)))

        {

  // Read stream.

  using(var stream = resource.GetStream())

  {

    ...

  }


  ...


  // Read stream again.

  using(var stream = resource.GetStream())

  {

    ...

  }

        }
StreamResource is efficient even if you need to process content only once, as
it monitors timings of reading of source data and compares it with timings of
data consumption. If the difference exceeds some threshold then StreamResource
caches source greedily, otherwise source is pooled lazily. Thus, input resources
can be released promptly. This is important, for example, when the source
depends on a database connection.
The use pattern is following:
// Acquire resource and get shared stream.

        using(var stream = new StreamResource(() =>
        CallService(params...)).GetStream(true))

        {

  ...

        }
Finally, StreamResource allows to process
data in a pipe stream mode. This is when you have a generator function
Action<Stream> that can write to a stream, and you want to read that data.
The advantage of StreamResource over real pipe stream is that it
can work without blocking of generator, thus releasing resources early.
The use pattern is similar to the previous one:
using(var stream = new StreamResource(output =>
        Generate(output, params...)).GetStream(true))

        {

  ...

        }
The source of the class can be found at
Streaming.zip.
Two monthes ago we have started
a process of changing column type from smallint to int in a big database.
This was splitted in two phases:
- Change tables and internal stored procedures and functions.
- Change interface API and update all clients.
The first part took almost two monthes to complete. Please read earlier post about
the technique we have selected for the implementation. In total we have transferred
about 15 billion rows. During this time database was online.
The second part was short but the problem was that we did not control all clients,
so could not arbitrary change types of parameters and of result columns.
All our clients use Entity Framework 4 to access the database. All access is done
though stored procedures. So suppose there was a procedure:
create procedure Data.GetReports(@type smallint) as

      begin

        select Type, ... from Data.Report where Type = @type;

      end;
where column "Type" was of type smallint. Now
we were going to change it to:
create procedure Data.GetReports(@type int) as

      begin

        select Type, ... from Data.Report where Type = @type;

      end;
where "Type" column became of type int.
Our tests have shown that EF bears with change of types of input parameters, but throws
exceptions when column type has been changed, even when a value fits the
range. The reason is that EF uses method SqlDataReader.GetInt16
to access the column value. This method has a remark: "No
conversions are performed; therefore, the data retrieved must already be a 16-bit
signed integer."
Fortunately, we have found that EF allows additional columns in the result set. This helped us to formulate the solution.
We have updated the procedure definition like this:
create procedure Data.GetReports(@type int) as

      begin

        select


    cast(Type as smallint) Type, -- deprecated

    Type TypeEx, ...


  from


    Data.Report


  where


    Type = @type;

      end;
This way:
- result column
"Type" is declared as deprecated;
- old clients still work;
- all clients should be updated to use
"TypeEx" column;
- after all clients will be updated we shall remove
"Type" column from the result
set.
So there is a clear migration process.
P.S. we don't understand why SqlDataReader doesn't support value
conversion.
If you deal with
web applications you probably have already dealt with export data to Excel.
There are several options to prepare data for Excel:
- generate CSV;
- generate HTML that excel understands;
- generate XML in Spreadsheet 2003 format;
- generate data using Open XML SDK or some other 3rd party libraries;
- generate data in XLSX format, according to Open XML specification.
You may find a good article with pros and cons of each solution
here. We, in our turn, would like to share our experience in this field. Let's start from requirements:
- Often we have to export huge data-sets.
- We should be able to format, parametrize and to apply different styles to the exported data.
- There are cases when exported data may contain more than one table per sheet or
even more than one sheet.
- Some exported data have to be illustrated with charts.
All these requirements led us to a solution based on XSLT processing of streamed data.
The advantage of this solution is that the result is immediately forwarded to a client as fast as
XSLT starts to generate output. Such approach is much productive than generating of XLSX using of Open XML SDK or any other third party library, since it avoids keeping
a huge data-sets in memory on the server side.
Another advantage - is simple maintenance, as we achieve
clear separation of data and presentation layers. On each request to change formatting or
apply another style to a cell you just have to modify xslt file(s) that generate
variable parts of XLSX.
As result, our clients get XLSX files according with Open XML specifications.
The details of implementations of our solution see in our next posts.
|